Thursday, February 28, 2013

Tip of the Day #238: Leftover Pasta

It is known that most of us have a difficult time gauging how much pasta to cook for a meal. I know myself that I am always left with enough to feed the entire neighbourhood! Instead of pitching it because the pasta generally doesnt 'keep' too well in the fridge afterwards, try this:
After your pasta has finished cooking and it’s time to drain it, don’t pour the water down the drain. Drain it into a large bowl and let it cool while you are eating.  When you have leftovers, put the leftovers back in the water.  Make sure the pasta is completely submerged. Cover the bowl and put it in the fridge. This will give you at least another week to finish the leftovers!

QUICK TIP: Lunchbox Love for School-Aged Children

Make your little ones feel special by creating some 'Lunchbox Love' for their lunches! Use colourful and cheery cardstock or scrapbook to produce little notes they can read while at school :)

Wednesday, February 27, 2013

Tip of the Day #237: Hang Pictures Easily

A useful tip for hanging pictures or wall decor is to use TOOTHPASTE! Dab a small amount on the back where all screws/nails will go, find your perfect place on the wall, press frame firmly against the wall-- and you're all set to hammer in your nails. It's that simple!

Tuesday, February 26, 2013

Tip of the Day #236: Easy Cleaning on Cupboard Tops

You may not think about this area very often--probably because you rarely see the top of your kitchen cabinets, that doesn't mean they aren't busy getting dusty and dirty. Grease, humidity and general kitchen use can make this a tricky and icky spot to clean. Forget the hassle and bust out a pantry staple to do the dirty work for you--WAX PAPER.

To keep the top of your kitchen cabinets (and tall armoires, bookcases and storage units) clean, simply tear a sheet the same depth as the cabinet and let it sit. It will collect the greasy, dusty goo that collects and then every few months you can change it out and ditch the collected junk. Easy peasy!

Monday, February 25, 2013

Tip of the Day #235: How to Clean Faucets Effectively

Soak a rag or cloth in white vinegar, then spread overtop of your faucet (including taps). Leave for 1-2 hours then wipe away all debris. If some dirt still remains in crevices, take an old toothbrush and scrub away!

Sunday, February 24, 2013

DIY i-SPY Game

I guarantee this will occupy your kiddos for hours!

I have two very active children, so I am constantly looking for ways to occupy them. While brainstorming one night recently, I thought of this cute little game to make! It's easy, quick and doesn't require many materials.

So what's the object of the game? You create a game card with a list of the objects included in the bottle. Your kids have to shake the tube around to search for the items that you have hidden within the rice and tick them off!

When making, 'layer' the rice--in other words, you must pour the rice in, add a little trinket or two, then add more rice and so on. This is so all objects do not float along the top. Also, leave about 1 inch at the top of the bottle to ensure the rice is easy to shake around.

Some items you can include are:

-stickers
-bottle caps
-marbles
-beads
-bouncy balls
-barbie shoes
-fake flower petals
-pen lids
-little balls of foil
-small erasers
-dinky cars
-paper clips

Or anything small around your home!

WARNING: Always remember to seal the lid tightly on the bottle to ensure no small children can ingest any objects.

Tip of the Day #234: Organizing Office Supplies

We all know how office supplies from paper clips to elastic bands can really get out of hand and cause major clutter. I suggest using an ice cube tray or two to place the different items in each spot--then place in a cupboard or deak drawer. Remember to always return the objects to their designated area when necessary.

Thursday, February 21, 2013

Tip of the Day #233: Dealing with Odors in Garbage Bins

Odor producing mold and bacteria in garbage cans can be dealt with by sprinkling 1/2 cup Borax in the bottom of the garbage can.

Tip of the Day #232: Best way to Disinfect Sponges & Cloths

 To disinfect smelly sponges, wash sponge thoroughly, then microwave it while it is wet, for a short period. When you see steam from the sponge, the bacteria in the sponge will be dead. Remove carefully, it will be hot! Wash the sponge thoroughly before use.

**Make sure the sponge has no metal components!**

Tip of the Day #231: Dealing with a Stye in your Eye

If you have a stye in your eye, boil some water, soak a regular tea bag in the water for about 2 minutes, don't put sugar or milk in the tea! ;) Take the tea bag out as hot as you can stand it and place it over the offending eye until it cools. Repeat this a few times a day.

Tip of the Day #230: Diminish the Looks of Scars

I was burned in a house fire awhile back and I can tell you this method truly works!

Gently massaging a scar after the area is well healed but within the first six months of the injury can help minimize scarring. By massaging you are helping to stretch out and soften the scar be helping break down the tough collagen fibers that are forming as part of the scar maturation.

DIY JEWELRY HOLDER

Since I am overly obsessed with ORGANIZATION, one thing that always bugged me was never having a place to hang all of my necklaces and earrings--leaving me to lose quite a few that became tangled with no hope of fixing! So sad.

When I was at the Dollar Store a few days ago, I came up with a great and inexpensive way to organize these items! I purchased an 8x10 photo frame ($1.50), corkboard sheets ($1.00/20 pack--I used 5 sheets for thickness) and a 100 pack of push pins (1.00--I used 4), making this organizer a total of $1.79!!!!!!! You can't go wrong there!!

To create, all you need to do is replace the glass from the photo frame with a few sheets of corkboard (thick enough that your pins will poke through). Stick your push pins wherever you want and hang your jewelry! I will be placing this organizer on the wall soon, but depending how long your jewelry is, you can choose to leave on your dresser or a table!

-GRILLING TIPS-

-Marinating quickly tenderizes meat and also adds additional flavor. Use roughly 1 to 2 cups of marinade for every 1 1/2 to 2 pounds of food. The marinade should completely surround the food. Cooked meat should never be returned to a cold marinade.

- A secret to tender, moist,tasty meat and fish is the cut you choose. The best cut for grilling steaks is a full one inch thick

- Whenever barbecuing, use tongs to turn the meat. A fork should never be used as it will punch holes in the meat and allow the natural juices to escape, causing the meat to lose flavor and become chewy.

- Tomato and/or sugar based BBQ sauces should be added only at the end of the grilling process, since these products will burn easily and are seldom considered an internal meat flavoring.

Tip of the Day #229: Cut down on Cleaning--Walls & Fixtures

Apply spray starch to doors, knobs, light switches and to painted walls along hallways and stairways where fingerprints accumulate. The coating will resist marks better.

Tip of the Day #228: Repairing a Marked/Dinged Refrigerator

If you have a refrigerator that has taken a 'beating' over the years and may be full of dents, scratches or various other marks, dab some correction fluid on the areas--it will cover the areas up nicely and look natural!
Correction fluid does come in a variety of coloura depending on the shade of your fridge.

Tuesday, February 19, 2013

Tip of the Day #227: Front Closet Organization

If you have children and little room to store coats, shoes, bags, etc here is a tip for you!
Place 'Command Hooks' (the white sticky ones) low on the walls and/or doors of your closet for your childrens belongings--this way, they are able to hang them up themselves as they are at arms reach and are not left just thrown in with the door shut (at least that's how it used to be in my house!)

Tip of the Day #226: Cleaning your Washing Machine

First of all, make white vinegar your best friend--she will help you out in so many situations, especially this one!

NOTE: This tip works for both top-loading and front-loading machines.

You may notice that your washing machine has quite a bit of soap build-up or in my case, I just recently purchased a used washer that had come from a home with very hard water and left quite a mess (the tub part and rubber folds were full of what looked like rust).

What you need to do is pour 2-3 cups of vinegar into the tub, and run the washing machine through a complete cycle on the hottest setting to remove odors, stains and detergent build up. If it is really bad, you may wish to repeat this process. DO THIS ONCE A MONTH TO MAINTAIN A CLEAN MACHINE.

For the lid/door, scrub around the edge with vinegar to remove mildew and detergent build up, especially where all the rubberized parts are!

Tips:

*To prevent mildewing, leave the lid open after you finish a load to allow the washing machine to dry out.

*Commerical fabric softeners leave build up in the machine. Make vinegar your fabric softener of choice, and the inside of your washing machine won't need to be cleaned as frequently – if at all.

Monday, February 18, 2013

Homemade *Banana Peanut Butter* Ice Cream

I originally saw the idea for this ice cream on Pinterest, but like with any recipe, I always tweak it to my liking. You honestly CANNOT go wrong by trying this idea! Not only is it super tasty (for both adults and kids alike), but it is HEALTHY, GLUTEN-FREE & DAIRY-FREE!! Yes, that must sound a bit funny considering dairy is generally the main ingredient in ice cream, but I assure you that the taste and consistency is the same!

Ingredients:

4 Ripe Bananas
2 tbsps Peanut Butter

Directions:

1. Chop bananas into pieces (size shown in photo)

2. Place flat on baking sheet and place in freezer for 2 hours

3. Remove from freezer and place all pieces in blender -- the bananas may stick a bit to the baking sheet, but just use a plastic spatula or knife to lift off!

4. You MUST have a powerful blender for this recipe to work properly! Begin blending frozen bananas. BE PATIENT--I cannot stress this part enough because it will take awhile to obtain a 'creamy' consistency. The first time I made the recipe, my bananas were almost going 'powdery' and I thought for sure something was wrong but I kept going!

5. Every few minutes, take a spoon and push down the bananas to start forming a base.

6. After the creaminess sets in, add the 2 tbsps of peanut butter.

7. Blend for 1-2 minutes--you will know when it is 'just right.'

8. You can serve right away, but after placing in a bowl, I popped mine back in the freezer for a bit.

I HOPE YOUR FAMILY ENJOYS THIS LITTLE TREAT AS MUCH AS MINE--YOU CAN TELL HOW MUCH MY LITTLE ONES DO BY THE PHOTO POSTED! ;)

Tip of the Day #225: Cleaning your Patio Furniture

For cleaning resin patio furniture, mix 1 part dish soap to 8 parts bleach then wipe on and leave for 30 minutes. Rinse and repeat if neccessary. Comes clean every time!

Saturday, February 16, 2013

Tip of the Day #224: Cleaning Shower Door Tracks

These tracks can fill up with so much 'guck' quickly! So, to clean--plug the drain hole in the door track with a little bit of paper towel made into a ball. Pour in undiluted white vinegar. Let this soak for about 30 minutes, unplug the holes and rinse track with a spray bottle of water, then run a rag down it. This will flush the accumulated build-up out of the track.

Tip of the Day #223: Cleaning Plastic Shower Curtains

Put the shower curtain in washing machine with one cup of white vinegar, 1/2 cup of your laundry detergent and several old, light coloured towels. Fill the washer with warm water and run through complete wash and rinse cycle. Remove from water and hang on shower rod immediately.

Tip of the Day #222: Keeping Buttons Secured

I cannot tell you how many times my daughter has come home from school missing buttons from her clothing, and of course, she has no idea where that button may be! :p
So, from now on, I always place a thin layer of clear nail polish on her buttons to keep them in place--the polish hardens and 'glues' the threads to the buttons!
I have even used this tip on a few of my blouses that have a some loose threads! ;)

Friday, February 15, 2013

Tip of the Day #221: Keeping your Trash Safe

Keep animals (like raccoons, dogs & cats) out of your garbage and avoid a huge mess by spraying your bags with insect repellent. The spray will deter, but not harm, the animals.

Tip of the Day #220: Preserving foods in Jars

If you have leftover sauces, soups or other foods in jars, place a double layer of plastic wrap under the metal lid to avoid a chemical reaction happening between the metal and the contents--thus, ensuring the food tastes better for much longer.

Tip of the Day #219: Ripening Fruit

To perfectly ripen your fruit, place in a brown paper bag, in a dark place for a few days!

Thursday, February 14, 2013

The Power of Chalk

Chalk isn't just for kids and teachers--there are so many useful benefits to those little white sticks!

Lifts Stains

Grease stains can benefit from some chalk treatment! Rub a piece of white chalk into any grease or butter stain and let it soak up the mess for a few minutes. Then, dust off any excess chalk and launder as usual. The chalk dust will get into the fibers and absorb the oils, making the stain easier to wash out.

Absorbs Moisture

Moisture and humidity can cause silver to tarnish. To slow the process, store a piece with your silver to absorb excess moisture and keep silver from tarnishing. This same method will work in your toolbox to keep your tools from rusting!

Stabilizes Screwdrivers

Rub some chalk on the business end of a screwdriver, and it's less likely to slip as you turn the screw.

Combats Mustiness

Hang a bundle of chalk in your closets and cabinets to keep them from getting damp and musty. The chalk will absorb excess moisture from the air -- humidity that otherwise leads to mustiness.

Repels Ants

To keep ants out of your house, draw chalk lines around your doorways and windowsills. Ants won't cross a chalk line. Why? It's not entirely clear, but some say the ants don't like the particles sticking to their feet, while others say they're averse to the calcium carbonate in the chalk. Whatever the reason, this nontoxic solution will keep ants outside where they belong!

Tip of the Day #218: Grating Cheese

Make that block of cheddar slide across your grater with ease by coating it with a little bit of non-stick cooking spray first. Also spray inside the grater so cheese wont get stuck in there and in turn, makes it easier to clean!

Wednesday, February 13, 2013

Tip of the Day #217: Dishwasher Tips

1. Save money on dishwasher supplies by purchasing the least expensive brand of detergent/soap. Then just add a few tsps of white vinegar right into your dishwasher before running it--the vinegar cuts grease and is guaranteed to leave your dishes spot-free and sparkling!

2. To clean your dishwasher, place 1 cup of white vinegar (in a bowl or measuring cup) on the top rack. Run of full (empty) cycle on the hottest setting.
Also, placing 1 packet of LEMON Kool-Aid in the dispenser and running a hot cycle as works because of the citric acid in the powder.

These two remedies will definitely help if you deal with hard water in your home! :)

Tip of the Day #216: Getting white socks back to WHITE

We all know white socks can look dingy in no time, but there is an easy remedy to brightening them again! Place socks in a pot of hot  water with 2 lemon slices or 1 tsp of lemon juice. Soak for 10 minutes then wash as normal.

Tuesday, February 12, 2013

Cleaning your Refrigerator

CLEANSERS

TOOTHPASTE

Non-abrasive toothpaste helps to cleanse and brighten refrigerators without the scratching properties of most household cleansers. Apply liberally with a sponge or rag and scrub until stains disappear. Rinse with a clean rag and warm water.

VINEGAR

Heat a small bowl of vinegar on the stove top or in the microwave and place inside refrigerator for five minutes. The steam and acid will loosen stuck-on foods and allow you to more easily remove them. (You can cut a lemon in half, add to 1 cup water, and heat, as well.)

ODOR REMOVERS

BAKING SODA

Baking soda has been an odor cure-all for centuries. To rid your fridge of offensive odors, add a cup of baking soda to a bowl or plate and place inside refrigerator for 24-hours. Remove and properly dispose of baking soda when done. You can also add an entire box of baking soda to the back of refrigerator to help cut down on odor contamination and keep your refrigerator smelling fresh year round.

**CHARCOAL

Activated charcoal is another great odor absorber--and one of the most effective! Place a dish or bowl of charcoal inside the refrigerator , and allow it to soak up odors for several hours to a few days. Charcoal works well on sour odors. Remove dish when finished and dispose of charcoal.

COFFEE

Fill a plate with freshly ground coffee and place on an empty shelf inside the refrigerator to remove offensive odors. Leave plate in place for several days. This works well on strong odors.

ODOR PREVENTION

TAKE INVENTORY

Once a week or immediately before going grocery shopping, take inventory of the contents of your refrigerator. Remove outdated foods promptly.

PROPER STORAGE

Always store leftovers, opened packages of meats and cheeses, perishable items, and strong foods in separate airtight containers. Foods which remain uncovered absorb odors from other foods and also contaminate other items, like fruits and vegetables.

WASH THE MEAT DRAWER

The meat drawer is the coldest part of your refrigerator and the most ideal place to store and thaw meats. Always use the drawer to avoid cross contamination of bacteria and foodborne illness. Also, clean the drawer when necessary. When meat juices have spilled over into the drawer, remove drawer and wash thoroughly with hot water and dish soap.

CLEAN UP IMMEDIATELY

Clean spills up immediately! Use hot water and dish soap to wipe spilled food items from drawers, racks, and refrigerator walls and shelves. Uncleaned surfaces lead to bacteria, mold, mildew, odor, and possible food borne illness.

Tip of the Day #215: Easy Deviled Eggs

When making deviled eggs, place the egg yolks in a plastic Ziploc bag with the rest of the ingredients you wish to use. Close the bag and mash everything together. Once everything is well mixed, cut off a small tip from one of the bottom corners of the bag and squeeze the contents into your egg white. Just toss the bag once you are done for easy cleanup!

Monday, February 11, 2013

Tip of the Day #214: Pizza Cutter Uses

When cutting or dicing veggies or meat (ex: scrambled eggs or stirfry), using a pizza cutter will make the job a lot quicker than chopping with a knife.

Tip of the Day #213: Toothpaste on Yellow Nails

Whiten nails all up by rubbing toothpaste to remove the stains. You can also add a few drops of lemon for extra whitening, it’s a natural bleaching agent!

Sunday, February 10, 2013

Tip of the Day #212: Uses for Q-Tips

Candle-Lighter- If the wick on your candle is burned out, dip the end of a Q-tip in rubbing alcohol, light the end and you can now reach that burnt down wick.

Dust Buster- Use a Q-tip to dust the creases and cracks of a picture frame or statue.

Zipper Un-sticker- Is your zipper stuck?  Dip that cotton end in olive oil to act as a lubricant and rub on the zipper for an easy zip.

Electronics Cleaner- Q-tips can be used to clean CDs, DVD players, radios,  cameras and computers.

Kid Paintbrush- It is obvious; kids make a mess when painting, so they might as well use a brush that you can throw away and is easy to hold in their little hands!  Use a Q-tip to eliminate a mess.

Tip of the Day #211: *REPOST* Eggs in the Oven

For anyone that may not know, the BEST way to make hard-boiled eggs is in the oven! Place your eggs in a muffin tray so they do not roll around, then pop in the oven for 25-30 minutes at 325 F degrees. Not only are they tastier, but they become much easier to peel! Do not worry, they will never explode...well unless you have a very powerful oven! :)

Saturday, February 9, 2013

Limit Your Clean-up Time When Cooking!

The last thing any of us feels like doing after slaving over a meal is cleaning up afterwards. Even if you have little helpers whose nightly chore is to do the dishes, there are sneaky ways you can minimize 'tidy-up time' to get most of the work done before dessert. Here's how:

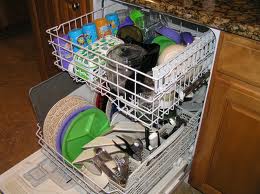
Empty the dishwasher

This should be the golden rule of tidy cooking - before you even think about pulling out a chopping board, empty the dishwasher, or better yet, get a little helper to do this job before you step into the kitchen--then re-stack the dishwasher as you cook.

Soak it

If you don't have a dishwasher, clean any dirty dishes before starting. Follow by filling the kitchen sink with hot, soapy water. As you work, drop in the utensils and dishes you've used into the water and let them soak. Washing up will be a cinch when the gunk easily slips off from pots and pans and all that's needed is a quick rinse and dry. BONUS: You use less water by filling up your sink and soaking dishes as opposed to running your tap while you scrub each dish!

Cover the counter

To catch mess quickly, line your working space with butcher's paper (or place a sheet of baking paper under a chopping board), then fold it up with the scraps and toss it when you're done. Easy-peasy.

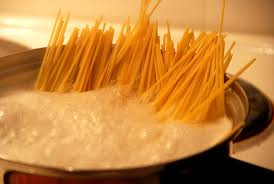
Keep it simple--UTILIZE YOUR CROCKPOT!

It goes without saying that the simpler the meal, the less mess there is to clean up. Make your life easy by cooking slow-cooker family favourites--the Internet is packed with so many wonderful crockpot meal ideas! And the best part? You'll only have the one pot to wash up afterwards!

Clean up in stages

Clear away any dishes and ingredients you've used for preparation before you start cooking. Likewise, after you've finished one task, have a quick tidy up before you start the next one. Cleaning up in stages like this will lighten the load at the end.

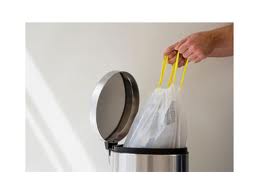
Have a garbage bag on the go

Keep a bag or bowl beside your cutting board to toss scraps into as you work, instead of spreading it over the counter top.

Cook cleanly

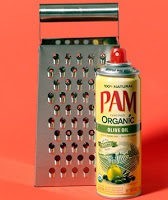
Avoid unnecessary elbow grease by lining baking and roasting pans with aluminum foil to save scrubbing them later. Likewise, spray measuring cups and spoons with non-stick spray not only prevents stains, but sticky ingredients, like honey, slide right out and the cups and spoons clean up easily.

Wear your tea towel

Tuck a tea towel or cloth into the waistband of your apron or pocket to wipe up small spills to stop them from becoming sticky blobs that need scrubbing later.

Be a multi-tasker

If you are a Mother, you should have mastered multi-tasking a long time ago. So while the water is boiling, load the dishwasher, while the oven is firing up, do a quick wipe down and while the rice is cooking, sweep the kitchen floor. You'll be amazed how much you can get done while cooking.

Turn on the dishwasher before bed

And lastly, flick the switch on your dishwasher before you go to bed.

Tip of the Day #210: Heart-Shaped Cupcakes!

To make heart-shaped cupcakes, just drop a marble at the top between the liner and cup!

Tip of the Day #209: Cooking with Garlic

Add garlic immediately to a recipe if you want a subtle taste and towards the end to blast it with flavour!

Friday, February 8, 2013

Tip of the Day #208: Organizing Clothes in Drawers

I came upon this idea after trying to put (well, 'stuff') all my children's clothes into their drawers--between birthdays, holidays and other various gifts, they just have WAY too many items! Piling clothes in their drawers never stayed in piles and not everything fit, so I really had to think of what would work! That's when I thought of piling their clothes the other way, or almost 'rolling' them (see picture.) Not only did everything fit nicely, but now rather than sorting through their drawers looking for a specific shirt, everything is now displayed in view--beautiful! This idea has now taken effect with every member's dressers and so far so good!

Thursday, February 7, 2013

Tip of the Day #207: Makeup Remover

One night I had finished my normal makeup remover and was in a bit of a bind so I used a few drops of my kids body wash (Johnson's Original in the yellow bottle). I was honestly shocked at how easily my makeup was removed, and after rinsing my face, my skin was extra soft! An added bonus is you know it is gentle enough for baby's skin, so it is not loaded with harsh chemicals. Needless to say, I now use it on a daily basis! Give it a try! :)

Tip of the Day #206: Cleaning grates on Gas Stove

1. Place each grate in a large Ziploc bag (ensure there are no holes in plastic.)

2. Fill bag with 3 tablespoons of Ammonia and close bag.

3. Let sit overnight for 12 HOURS!

4. Remove grate from bags and rinse thoroughly. There shouldn't really be a need to scrub at this point.

That's it--so easy!

Tuesday, February 5, 2013

Tip of the Day #205: Scrap the Bed Skirt!

Use a fitted sheet to cover your box spring as well! Makes such a difference :)

Tip of the Day #204: Preventing Fluff on Clothing

Place an old towel in the wash with tracksuits, sweatshirts and jerseys to stop fluff from forming on the garment

Tip of the Day #203: Cleaning Bath Toys

Bath toys can get pretty disgusting with mold and old water..and not to mention the smell that comes along with it all! Use your glue gun and squeeze glue into the hole on the bottom of each toy to close it and prevent nastiness in the future!
To clean out your existing ones, soak in straight white vinegar for a day or so.

Monday, February 4, 2013

Tip of the Day #202: Keeping Berries Fresh

Prolong the life of fresh berries by preparing a mixture of one part vinegar (white or apple cider work best) and ten parts water. Dump the berries into the mixture and swirl around. Drain, then rinse and pop in the fridge!

Saturday, February 2, 2013

Tip of the Day #201: Organizing your Clothes

When it comes to clothes hanging in your closet, turn all the hangers backwards--once you wear a piece of clothing and return it to its place, hang it back up with the hanger facing forward. At the end of the year (or after 6 months), toss any items that are still on the backward hangers--you probably won't miss it if you haven't worn it that entire time.

Friday, February 1, 2013

DETOX--Green Smoothie Recipe

I have recently began whipping up this little concoction after hearing how 'Green Smoothies' are all the rage these days! I had no expectation, because the thought of 'spinach' going into my drink  really didn't seem all that appetizing!
Now, I can tell you I am ADDICTED! Not only IS the entire smoothie delicious, but it is jam-packed with healthy ingredients and you are sure to see the pounds dropping if you stick to it!

Here is the recipe:

2 handfuls of baby spinach
5 strawberries
1 banana
1/2 peeled orange
1 apple (optional)
1 cup of yogurt (any flavour)

Blend and Enjoy! :)